We describe, step-by,step, how we added blog reactions into Docusaurus by doing component swizzling and integrating with Google's Firebase.
The code discussed here is available in our GitHub repository. And you can also check out a demo at demo-docusaurus-blog-reactions.ovisly.com!
We spent a lot of time deciding which blogging platform to use for Ovisly and Heromode. It took us months of debating and feature comparison.
I favored Docusaurus. We already chose Docusaurus for the Heromode App Website, primarily because we needed a platform that makes adding and maintaining documentation easier. With Docusaurus, we were able to set up HeroMode's documentation, HeroGuide, over a weekend.
While Docusaurus also comes with a blog, it doesn't come with audience interaction features like commenting and subscription. So we turned to Medium, the blogging platform powerhouse.
We created a Medium account. We also created a new publication. But once we got to the page of creating a new blog post, the big white blank page felt so intimidating. All I could think of was the N. Bedingfield song:
🎶 Staring at the blank page before you 🎵
🎵 Open up the dirty window 🎶
🎼 Let the sun illuminate the words that you could not find 🎵
And not in a cheerful, create-your-own-destiny kind of way. It was more of a serious-blogger's-block, the-blinking-curser-is-illuminating-on-words-i-cannot-find kind of way.
So, we returned to Docusaurus as our blogging platform. Nonetheless, we still wanted to have some way of audience interaction. For one of our Ovisly Friday Hackathons, I decided to give it a try.
Ingredients
I wanted to start simple. How about let's add buttons for reactions like Slack? Then for each blog, readers can click on the reactions that resonate with them.
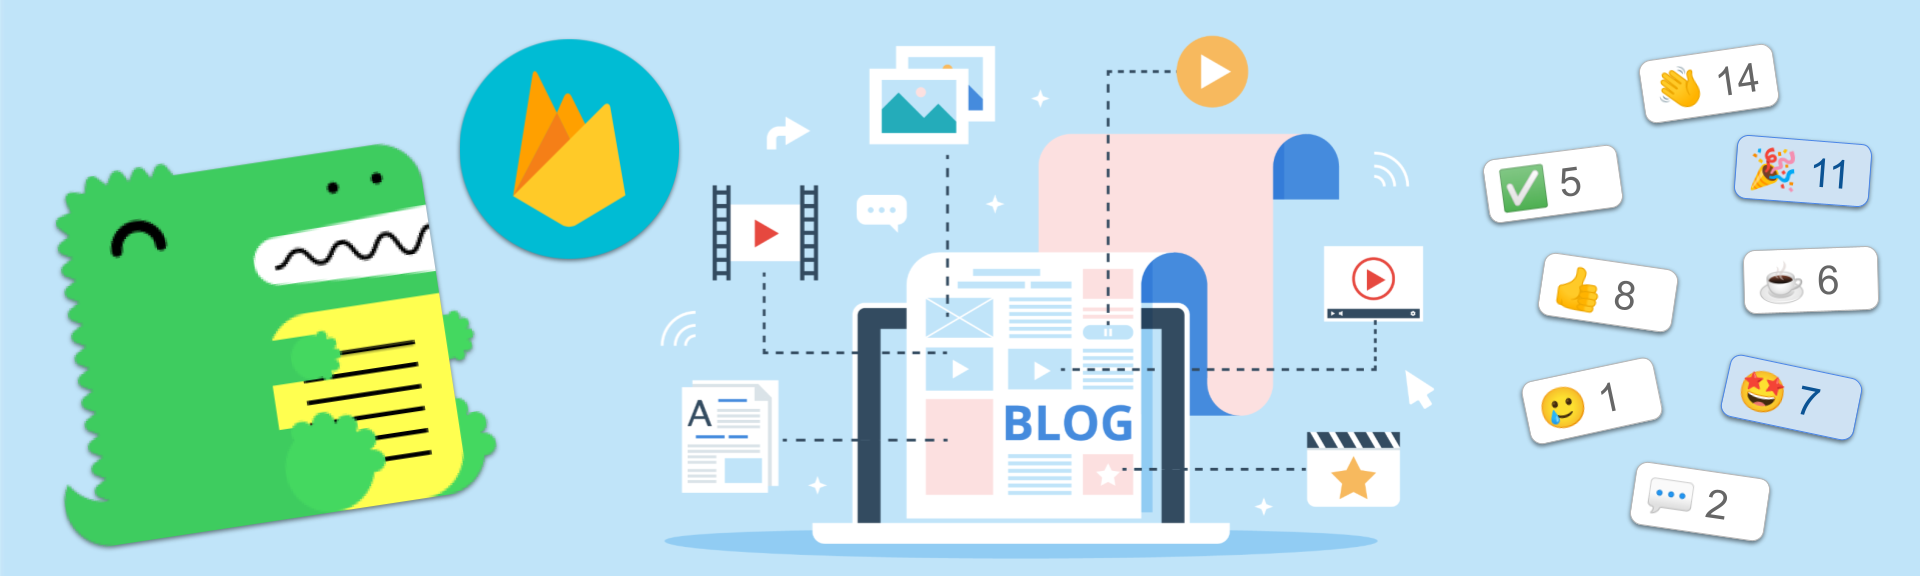
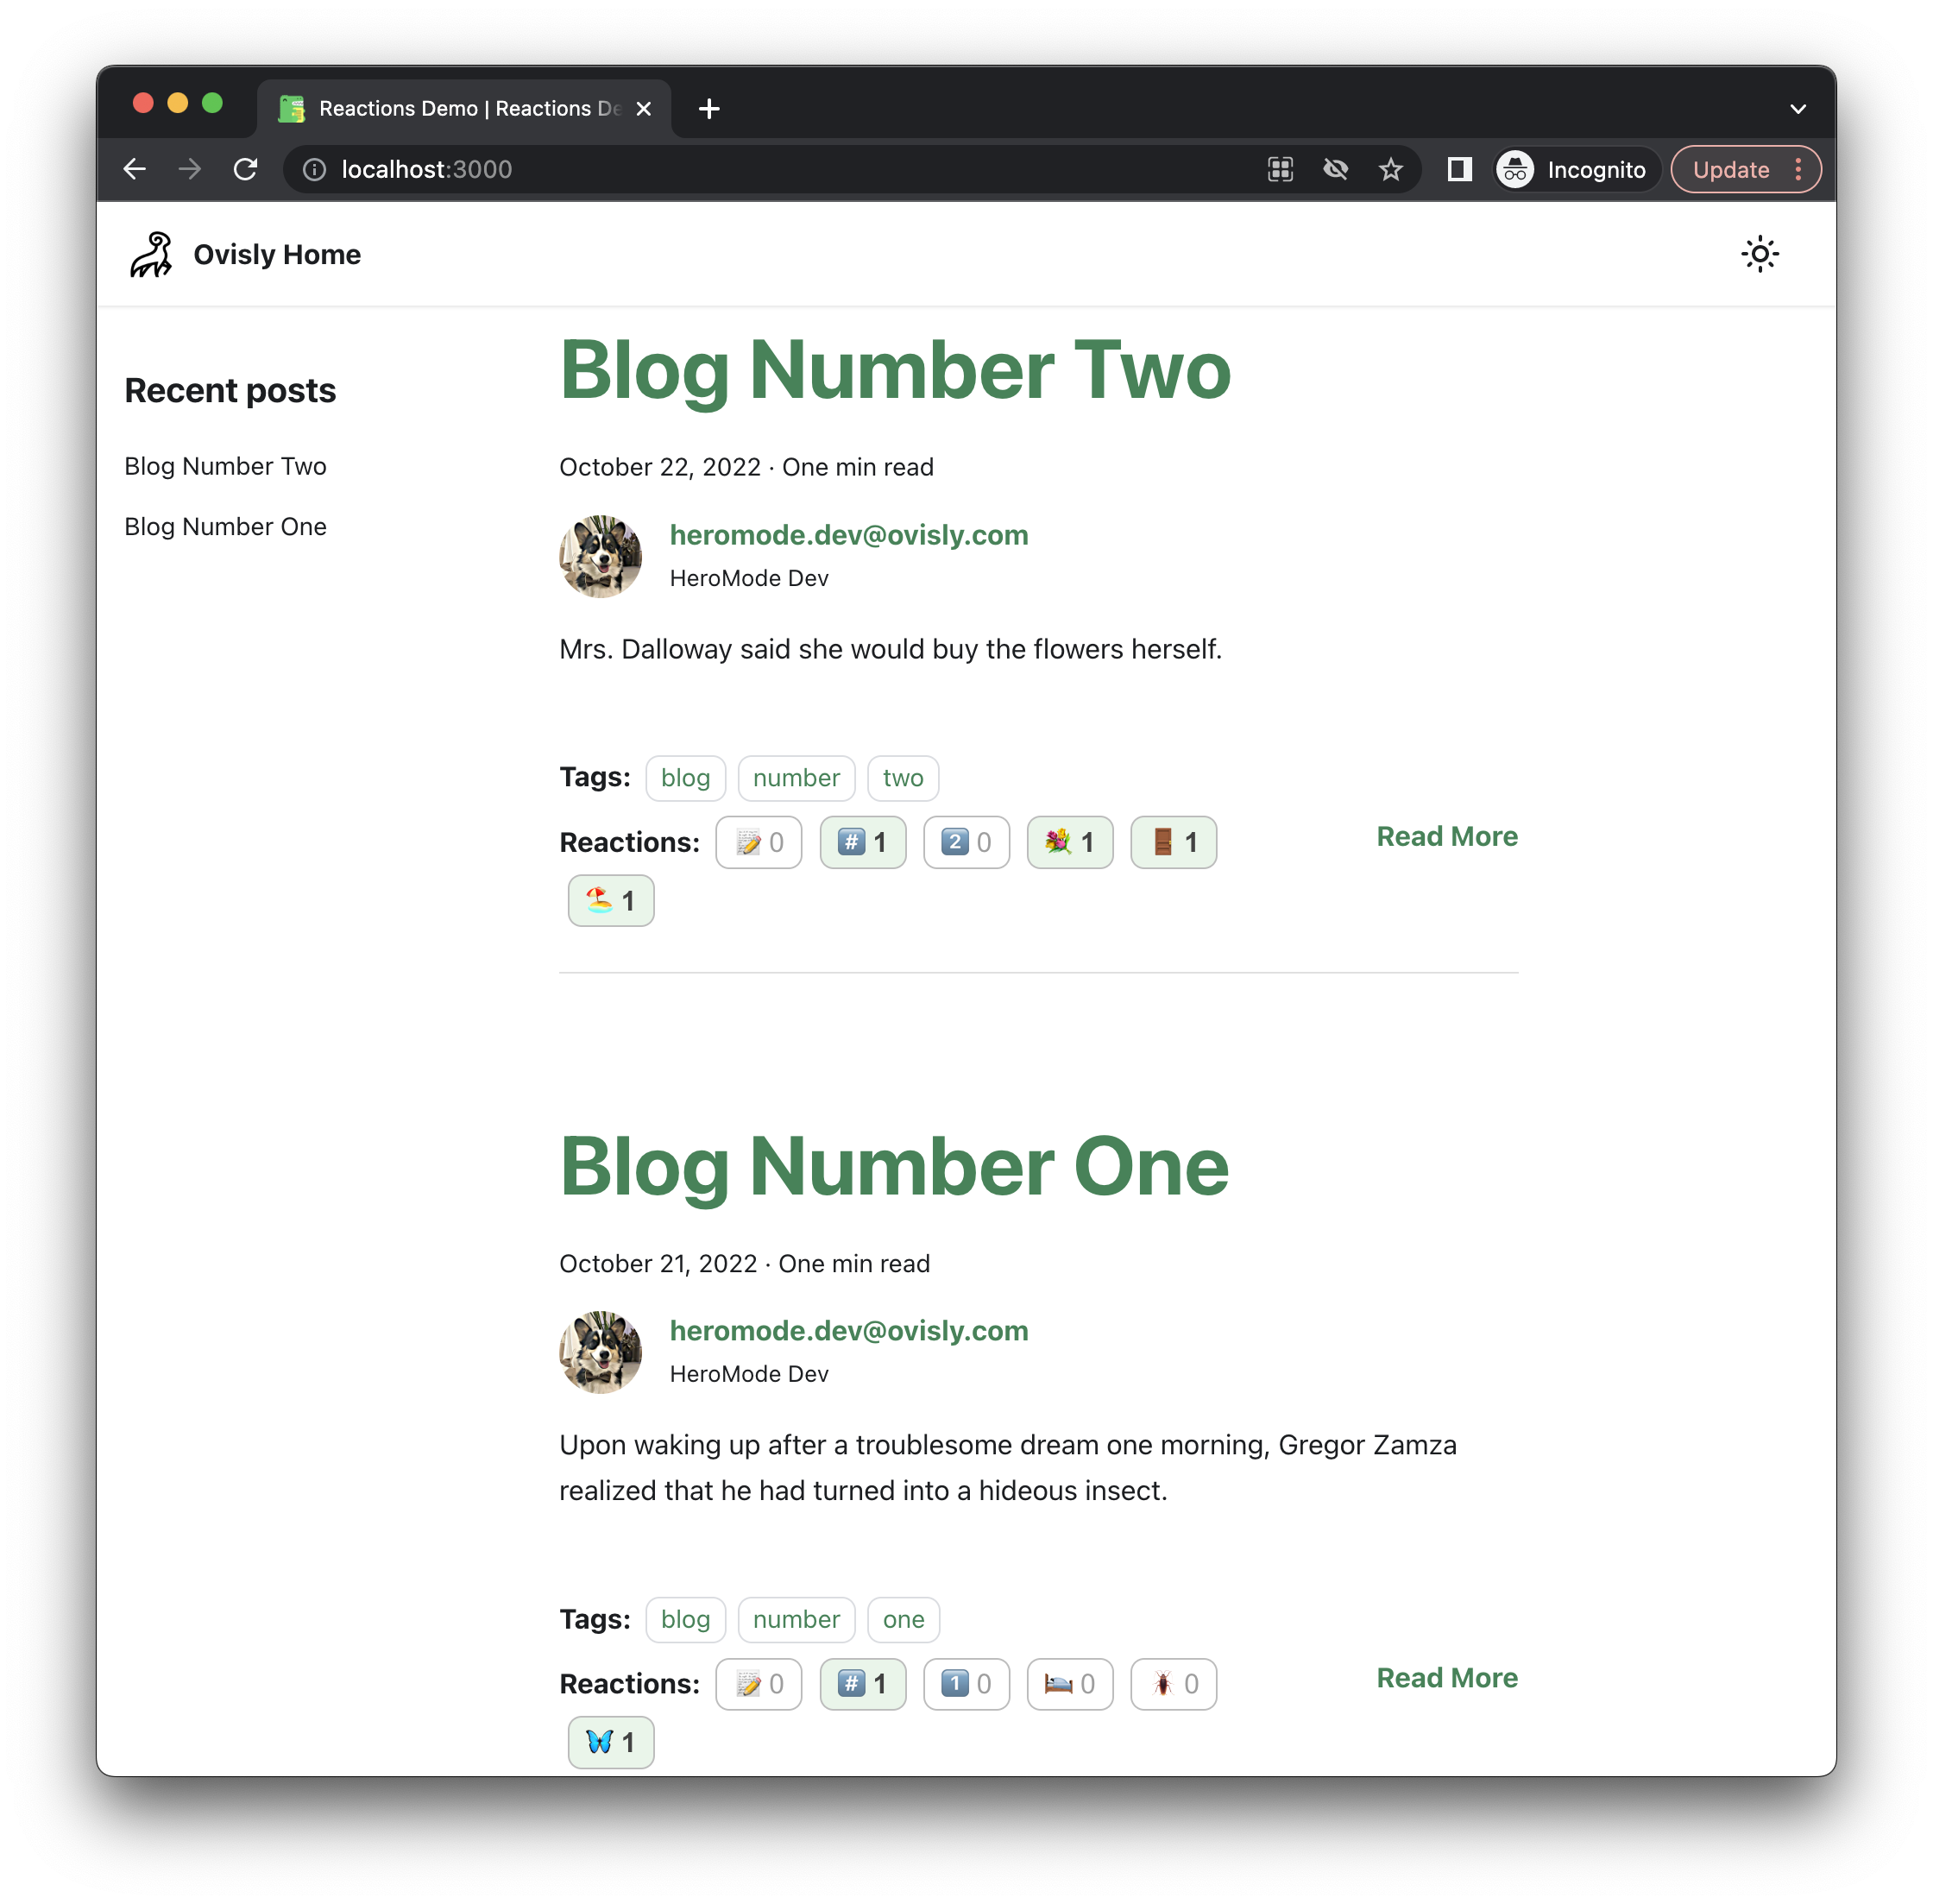
Many little experiments later, we got it to work! And that's how on the Ovisly blog and HeroMode blog, you see the little reaction buttons under each blog post.
Above: We have added blog reactions to our blogs using Docusaurus and Google's Firebase.
Docusaurus is extremely customizable. To add reactions to your blog, you'll need the following:
- A Docusaurus project with blog enabled
- A Google account (for Firebase)
- Within Firebase, the product we will use is the Firestore database
- Optionally, you can use Firebase Hosting
We have added the code in a GitHub repository here.
Set Up Your Docusaurus Project
Create a new Docusaurus project (if you don't have one already) with
npx create-docusaurus@latest blog-site classicFor simplicity, we will configure the project to be in blog-only mode.
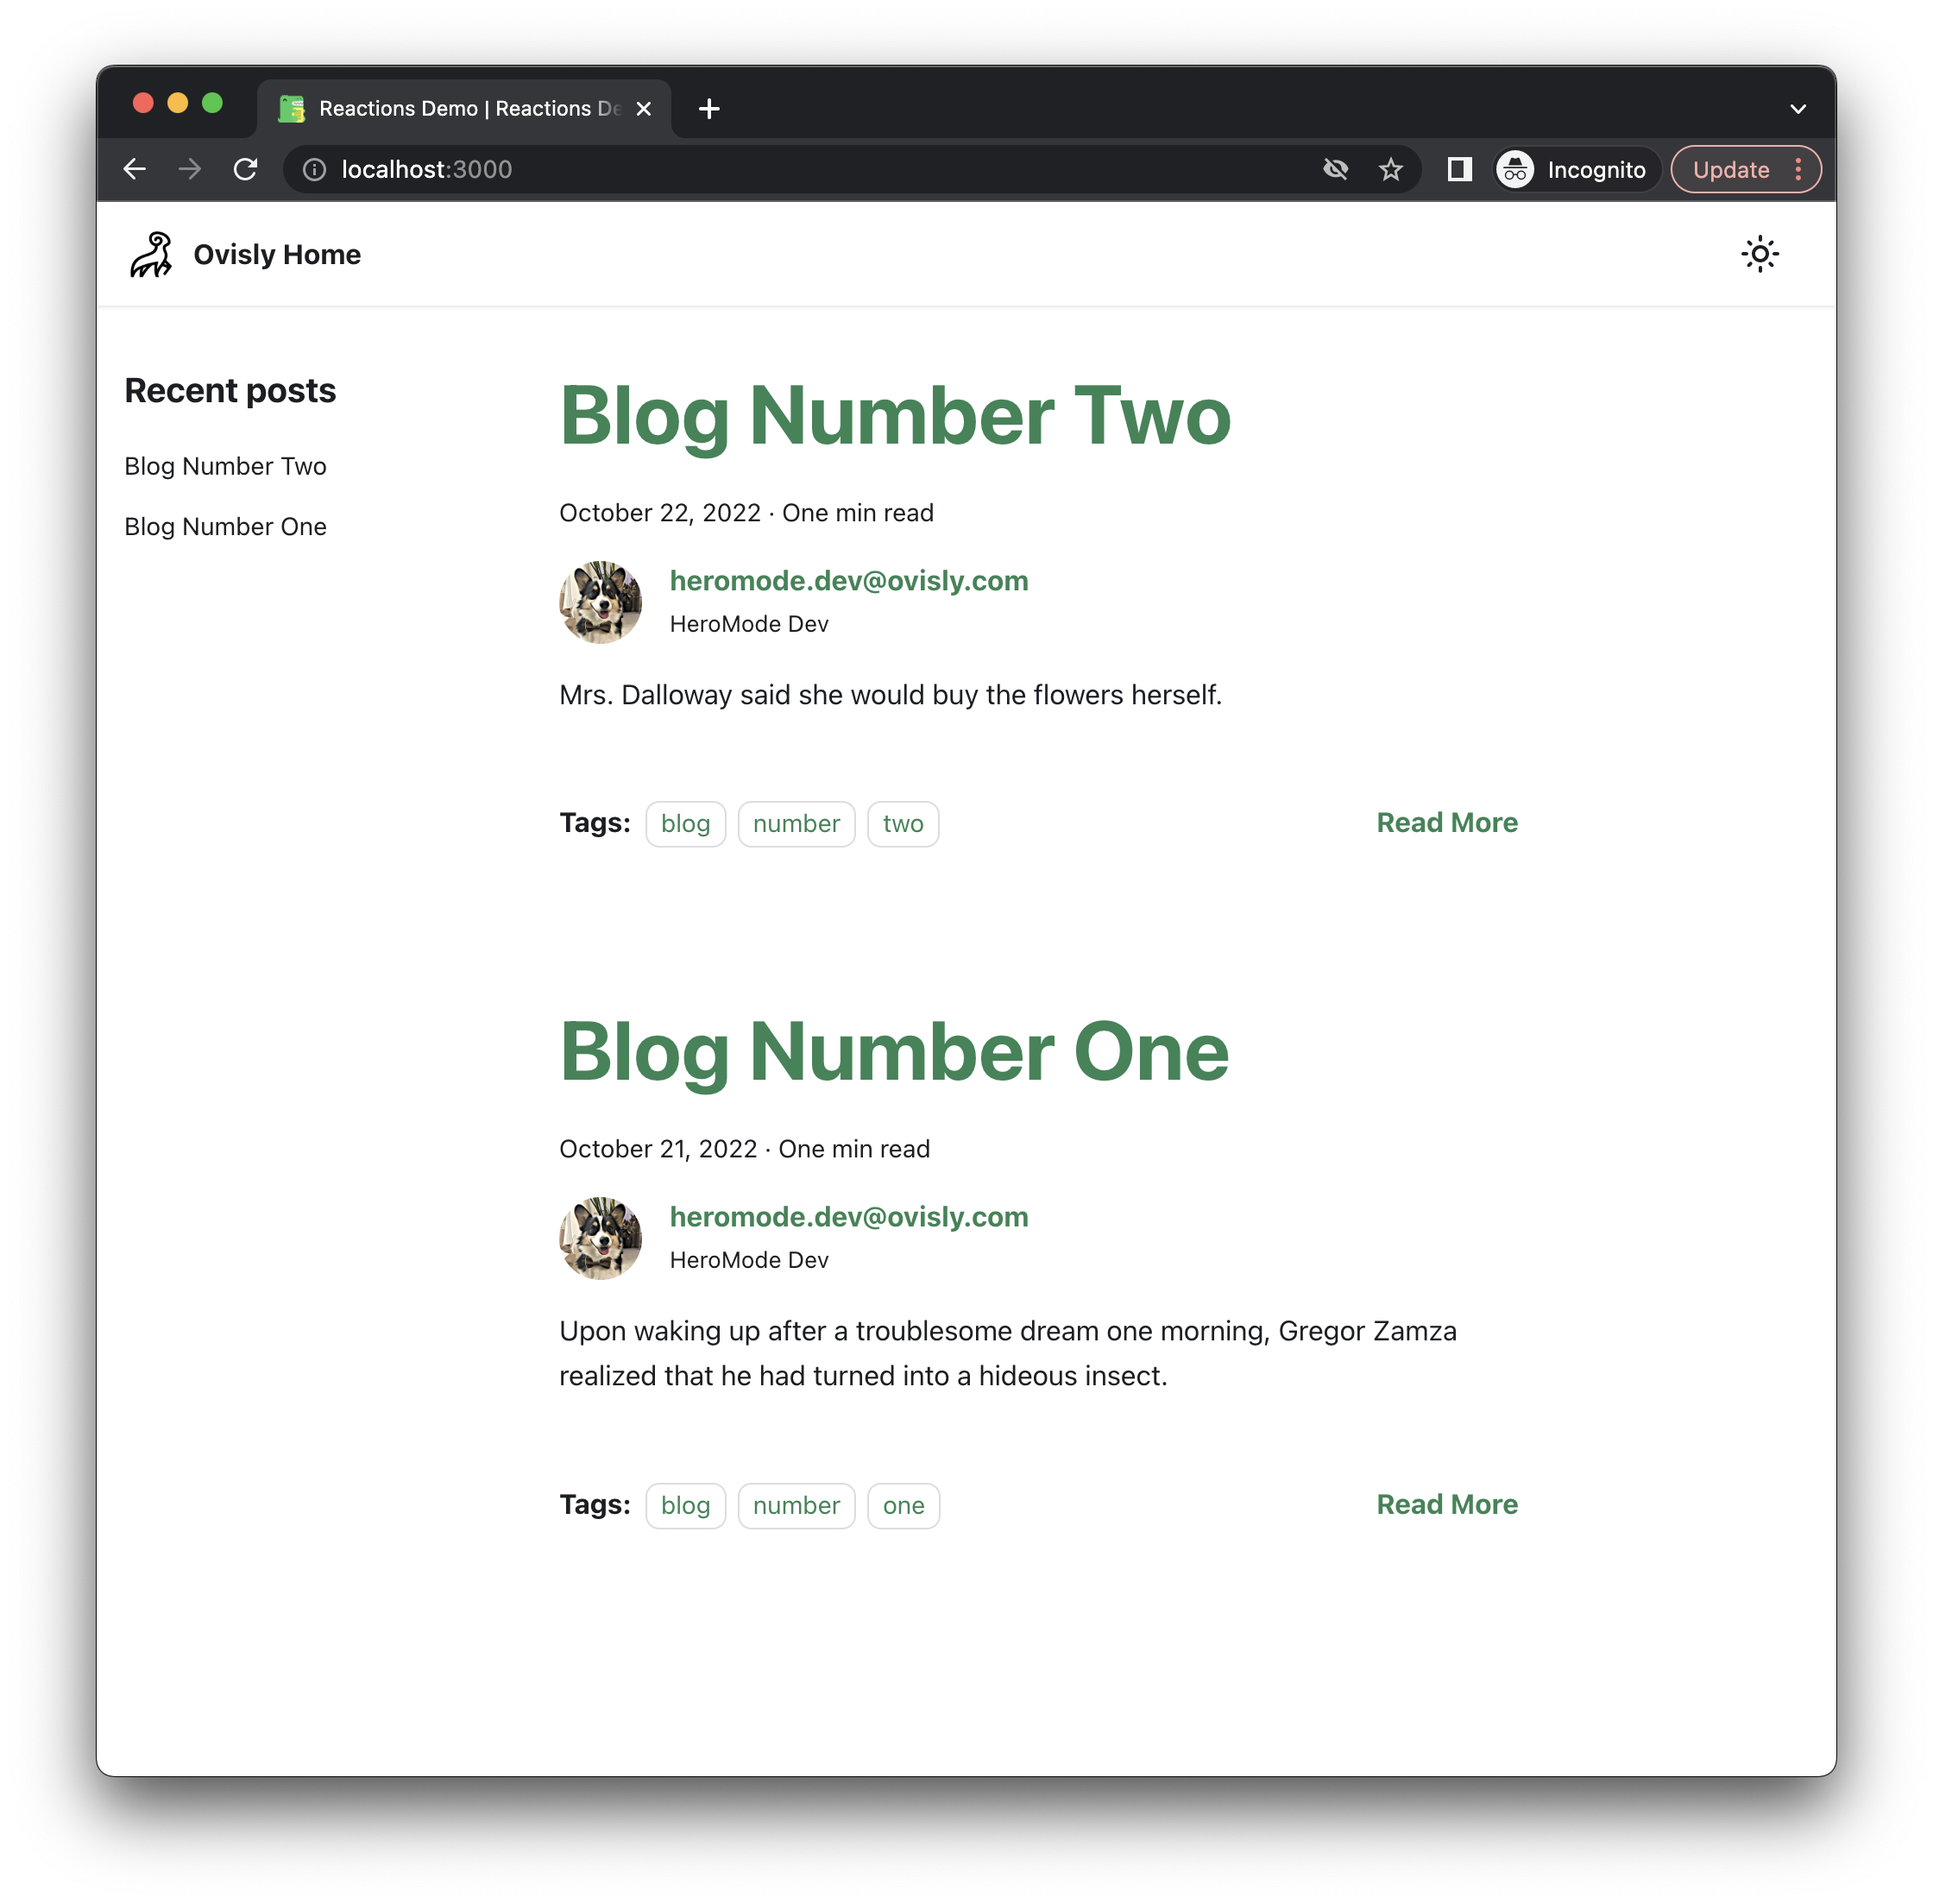
Create some blog posts. Your blog list page would look something like below.
Customize Blog Layout with Swizzling
Docusaurus Swizzling, besides sounding
delicious, makes Docusaurus infinitely customizable. What we will do is to
customize the BlogPostItem/Footer component.
npm run swizzle @docusaurus/theme-classic BlogPostItem/Footer -- --ejectYou will get a warning. Swizzling means we are replacing this component with our own customizations, so future Docusaurus changes can become incompatible. That's okay; it just means that if we update Docusaurus version, we need to pay attention to our swizzled component to see if it needs corresponding updates.
After running the swizzle command, we get new files
src/theme/BlogPostItem/Footer/index.jsandsrc/theme/BlogPostItem/Footer/styles.module.css. It is now our responsibility to take care of them.
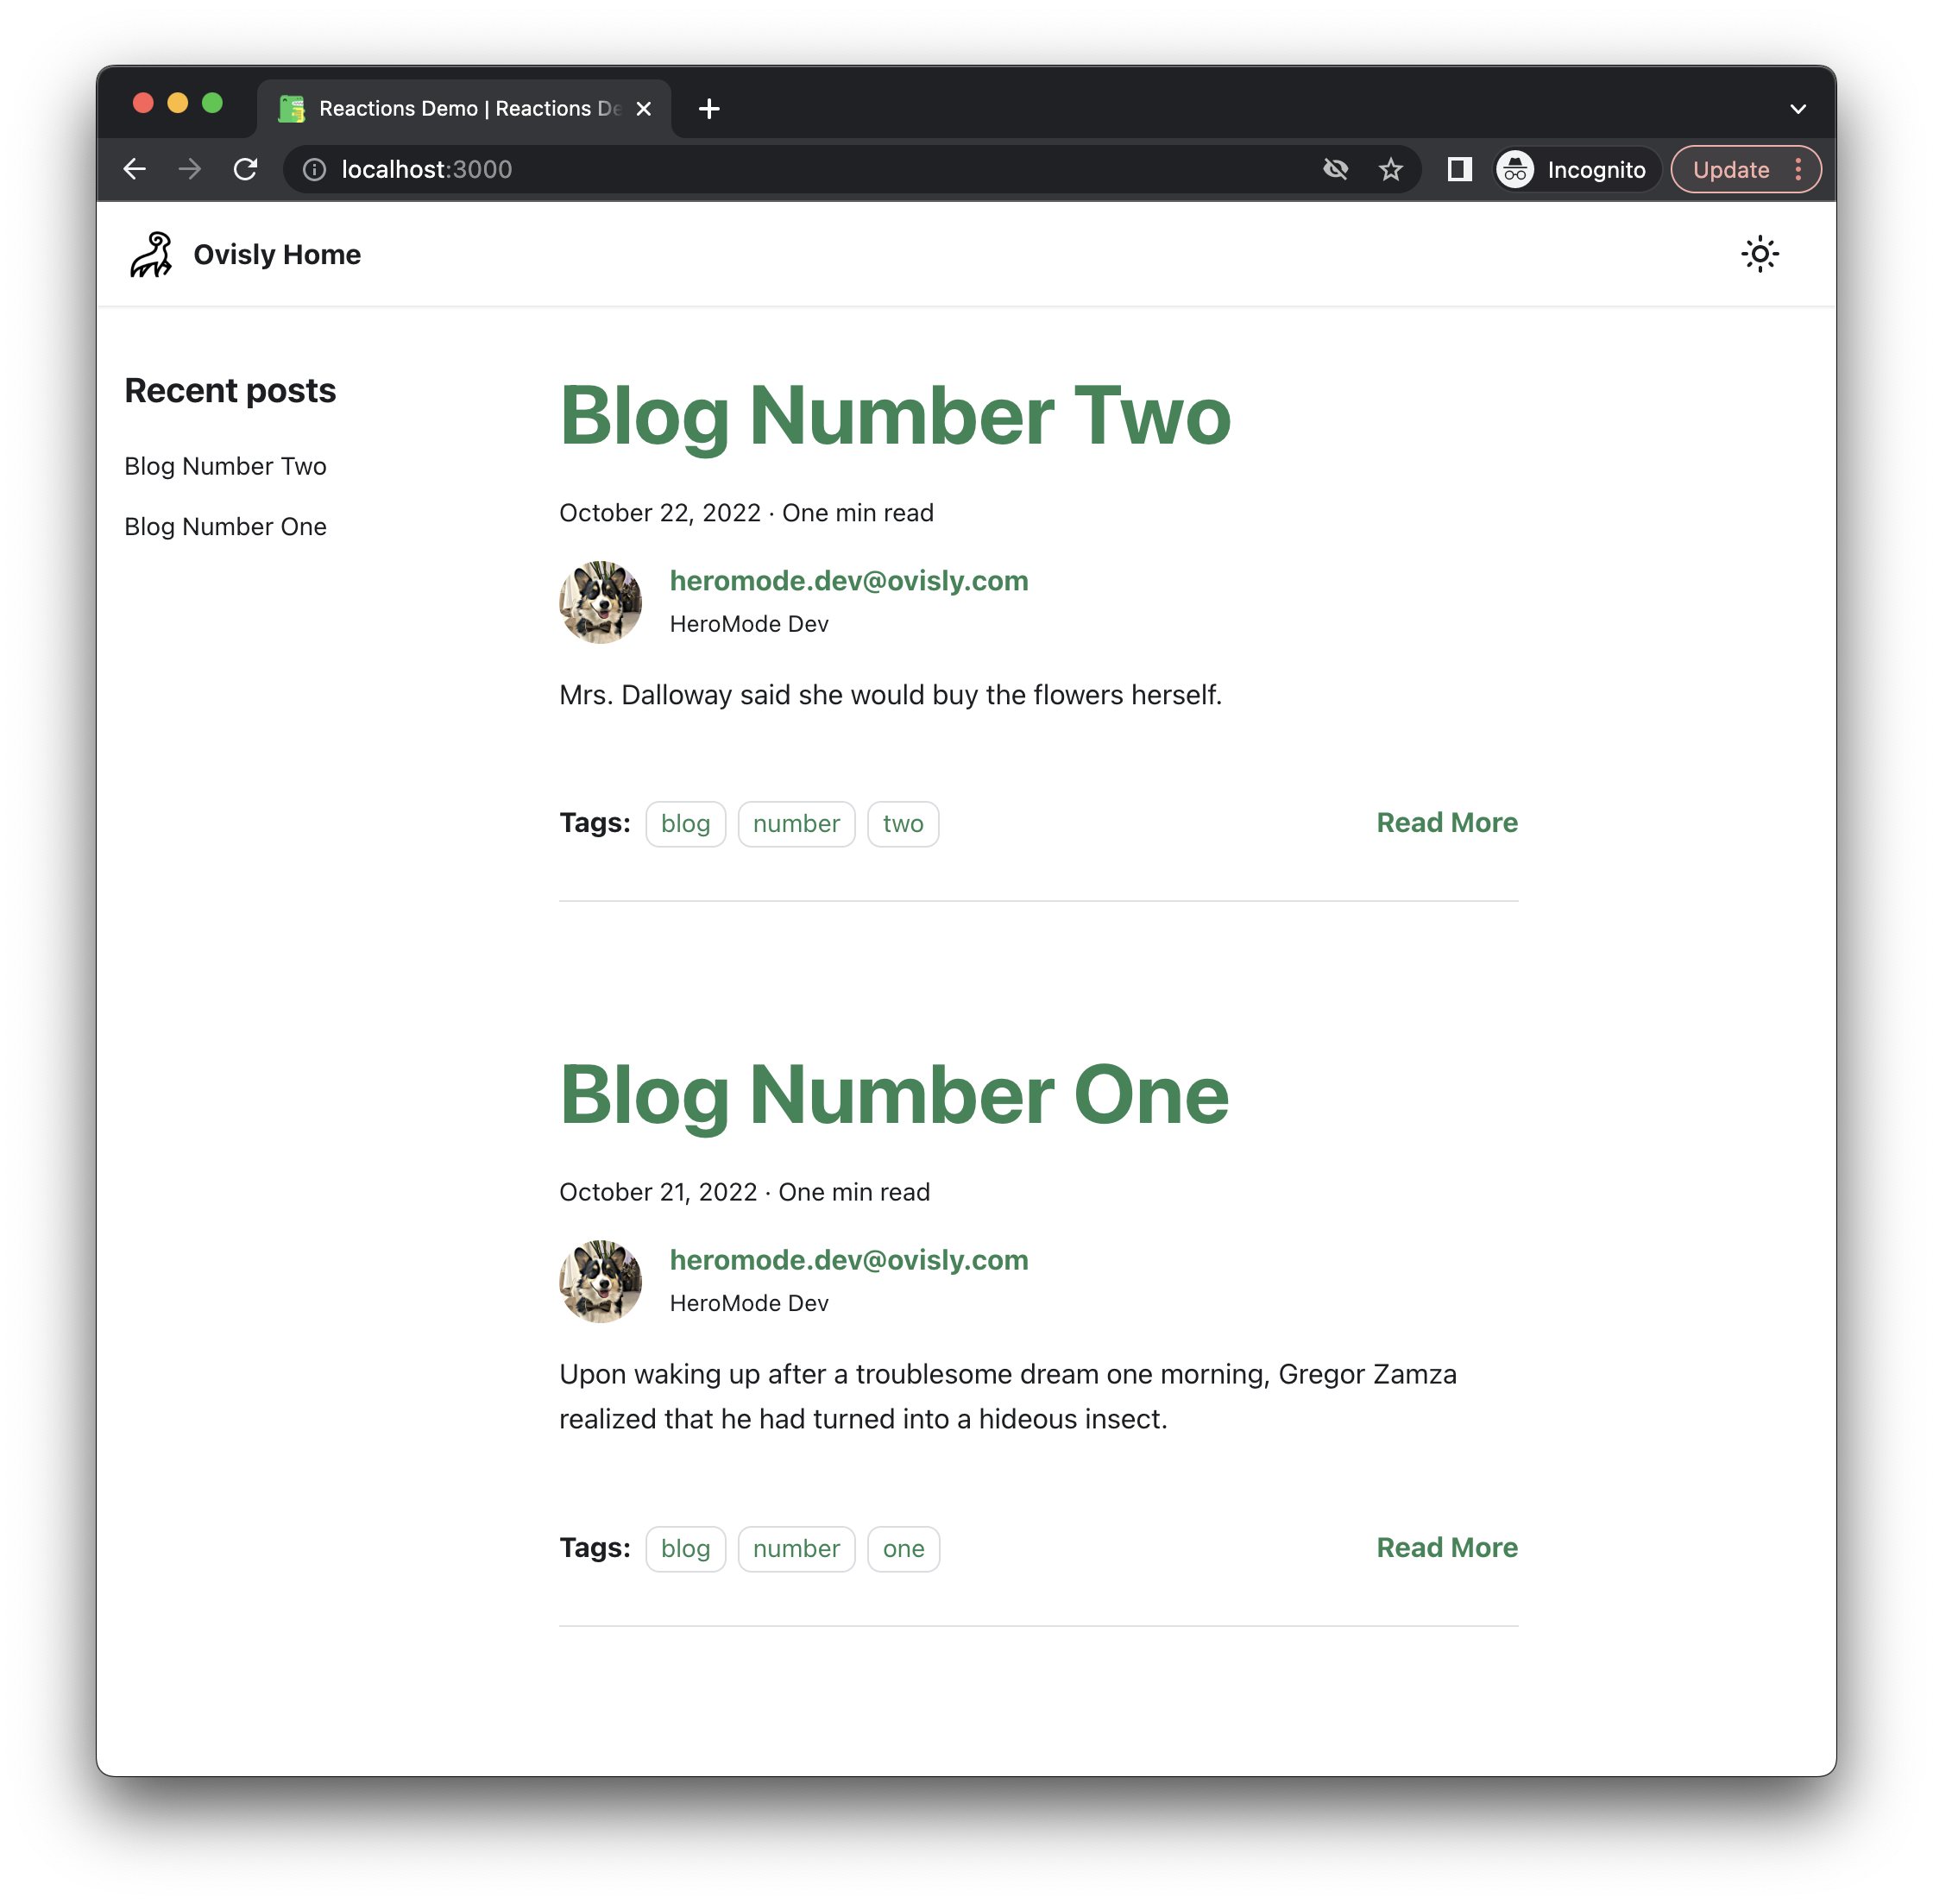
Add Dividers Between Blog Summaries
Before adding reactions, let's do something simple to make sure we understand what's happening. In the blog list page, there is no visual divider between individual blog summaries. So for an introductory exercise, let's simply add a divider.
We will create a divider as a React component. And to keep components organized, we will create a folder
customizations. The divider component is quite simple:
import React from "react";

export default function BlogEndBar() {
  return (
    <hr
      style={{
        backgroundColor: "#e0e0e0",
        height: 1,
      }}
    />
  );
}
- Then we can introduce this component into
BlogPostItem/Footer:
// ...
import BlogEndBar from "@site/customizations/BlogEndBar";
// ...

export default function BlogPostItemFooter() {
  // ...
  {
    !isBlogPostPage && <BlogEndBar />;
  }
  // ...
}
- Now our blog list page shows a divider between each blog summary!
Blog Reactions Mini Design Doc
What we will do is to create another customized component for the reaction buttons. That also means we need to have a backend database to track how many times a reaction has been clicked. We also want to track, locally, if a user has already clicked on the same reaction, so that they can remove their vote by clicking on the same reaction again.
We will let the blog author choose what reactions will be available for their post. And that will be specified in the front matter of the post in the Markdown file.
For the backend database, we will use Google's Firebase.
Set Up Your Firebase Project
In the Firebase console, create a new project. We chose to also add hosting to this project so that we can host the demo site.
Create a web app for this project. This will give you instructions on how to use Firebase in your app. Specificaly, install SDK with
npm install firebase.You will also get all the configuration parameters specific to your project. We will store these parameters as environmental variables, and organize them by creating an
integrationsfolder:
// Import the functions you need from the SDKs you need
import { initializeApp } from "firebase/app";
import { getFirestore } from "firebase/firestore";

// Your web app's Firebase configuration
// For Firebase JS SDK v7.20.0 and later, measurementId is optional
const firebaseConfig = {
  apiKey: process.env.FIREBASE_API_KEY,
  authDomain: process.env.FIREBASE_AUTH_DOMAIN,
  projectId: process.env.FIREBASE_PROJECT_ID,
  storageBucket: process.env.FIREBASE_STORAGE_BUCKET,
  messagingSenderId: process.env.FIREBASE_MESSAGING_SENDER_ID,
  appId: process.env.FIREBASE_APP_ID,
  measurementId: process.env.FIREBASE_MEASUREMENT_ID,
};

// Initialize Firebase
const app = initializeApp(firebaseConfig);

export const firestore = getFirestore();
Environmental Variables
- In a
.envfile, you would populate the configurations for your Firebase project:
FIREBASE_API_KEY=...
FIREBASE_AUTH_DOMAIN=...
FIREBASE_PROJECT_ID=...
FIREBASE_STORAGE_BUCKET=...
FIREBASE_MESSAGING_SENDER_ID=...
FIREBASE_APP_ID=...
FIREBASE_MEASUREMENT_ID=...
You need to tell Docusaurus to use the
.envfile. First, install the relevant plugin withnpm install docusaurus2-dotenv.In your
docusaurus.config.js, specify you want to use the plugin by adding
  plugins: [
    [
      "docusaurus2-dotenv",
      {
        path: "./.env",
      },
    ],
  ],
Integrating with Firestore
Configure your Firebase project's Firestore security to allow read and write to only the
reactionscollection. You can also use a different collection.Then, we use the Firebase SDK to retrieve data on each reaction of each blog.
We also check local storage to see if the same user has already clicked on a reaction.
import { firestore } from "@site/integrations/firebase";
import { collection, getDoc, setDoc, doc } from "firebase/firestore";

const collectionName = "reactions";

export function zeroReactions(reactions) {
  // Given an array of reactions, generate an object with key being each
  // reaction and values being zero. Zeros are used as a placeholder state until
  // actual data is read.
  const objReactions = {};
  reactions.forEach((r) => (objReactions[r] = 0));
  return objReactions;
}

export function initializeReactionCountsFromDB(
  slug,
  reactionCounts,
  setReactionCounts
) {
  getDoc(doc(firestore, collectionName, slug))
    .then((res) => {
      if (res.exists()) {
        // Check if every reaction is in the database. If not, initialize to
        // zero.
        const dataDB = res.data();
        Object.keys(reactionCounts).forEach((r) => {
          if (!Object.keys(dataDB).includes(r)) {
            dataDB[r] = 0;
          }
        });
        setReactionCounts(dataDB);
      } else {
        // Create the document with all zeros for each reaction.
        updateReactionsDB(slug, reactionCounts);
      }
    })
    .catch((err) => {
      console.log("[initializeReactionCountsFromDB] error:", err);
    });
}

export function updateReactionsDB(slug, reactionCounts) {
  const newDocRef = doc(firestore, collectionName, slug);
  setDoc(newDocRef, reactionCounts).catch((err) => {
    console.log(err);
  });
}

const localStorageKey = (slug) => {
  return "@ovisly-blog-reactions-" + slug;
};

export function getReactionStateLocal(slug, reaction) {
  const key = localStorageKey(slug);
  const item = localStorage.getItem(key);
  if (item === null) {
    const itemObj = {};
    itemObj[reaction] = false;
    localStorage.setItem(key, JSON.stringify(itemObj));
    return false;
  } else {
    // Check if the reaction is in the object.
    const itemObj = JSON.parse(item);
    if (Object.keys(itemObj).includes(reaction)) {
      return itemObj[reaction];
    } else {
      itemObj[reaction] = false;
      localStorage.setItem(key, JSON.stringify(itemObj));
      return false;
    }
  }
}

export function setReactionStateLocal(slug, reaction, value) {
  const key = localStorageKey(slug);
  const item = localStorage.getItem(key);
  const itemObj = JSON.parse(item);

  itemObj[reaction] = value;
  localStorage.setItem(key, JSON.stringify(itemObj));
}
Reaction Button Component
We will create a component for the reaction button. Each button contains the emoji and the count for how many users have clicked or voted for it. We will use
styled-componentto manage the css, but it's optional if you'd like to use something else. Install it withnpm install styled-components.Then we create our button component:
import * as React from "react";
import styled from "styled-components";
import {
  getReactionStateLocal,
  setReactionStateLocal,
  updateReactionsDB,
} from "@site/integrations/reactions";

const ActiveButton = styled.button`
  background: #e8f5e9;
  font-size: 16px;
  font-weight: bold;
  border-radius: 8px;
  border: 1px solid #bdbdbd;
  color: #424242;
  margin: 0.1em 0.3em;
  padding: 0.24em 0.6em;
`;

const InactiveButton = styled.button`
  background: transparent;
  font-size: 16px;
  border-radius: 8px;
  border: 1px solid #bdbdbd;
  color: #9e9e9e;
  margin: 0.1em 0.3em;
  padding: 0.24em 0.6em;
`;

export default function ButtonReaction({
  slug,
  title,
  reaction,
  reactionCounts,
  setReactionCounts,
}) {
  const isActive = getReactionStateLocal(slug, reaction);
  const ButtonComponent = isActive ? ActiveButton : InactiveButton;

  return (
    <ButtonComponent
      title={title}
      onClick={() => {
        const newReactions = { ...reactionCounts };
        if (isActive) {
          newReactions[reaction] = newReactions[reaction] - 1;
          setReactionStateLocal(slug, reaction, false);
        } else {
          newReactions[reaction] = newReactions[reaction] + 1;
          setReactionStateLocal(slug, reaction, true);
        }
        setReactionCounts(() => newReactions);
        updateReactionsDB(slug, newReactions);
      }}
      type="button"
    >{`${reaction} ${reactionCounts[reaction]}`}</ButtonComponent>
  );
}
Add Reaction Buttons to Blog Posts
- Now that we have the button component, for each blog post, we add a button for each of the reactions.
import React, { useEffect, useState } from "react";
import {
  initializeReactionCountsFromDB,
  zeroReactions,
} from "@site/integrations/reactions";
import ButtonReaction from "@site/components/ButtonReaction";

export default function BlogReactions({ reactions, slug }) {
  const [reactionCounts, setReactionCounts] = useState(
    zeroReactions(Object.keys(reactions))
  );

  useEffect(() => {
    initializeReactionCountsFromDB(slug, reactionCounts, setReactionCounts);
  }, []);

  return (
    <footer className="row">
      <div className="col">
        <b>{Object.keys(reactions).length > 0 ? "Reactions:  " : ""}</b>
        {Object.keys(reactions).map((char) => (
          <ButtonReaction
            key={char}
            slug={slug}
            reaction={char}
            title={reactions[char]}
            reactionCounts={reactionCounts}
            setReactionCounts={setReactionCounts}
          />
        ))}
      </div>
    </footer>
  );
}
- And we introduce the
BlogReactionscomponent into Blog Post Item:
// ...
import BlogEndBar from "@site/customizations/BlogEndBar";
import BlogReactions from "@site/customizations/BlogReactions";
// ...

export default function BlogPostItemFooter() {
  // ...
  // Get reactions from blog metadata.
  const reactions = Object.keys(metadata.frontMatter).includes("reactions")
    ? metadata.frontMatter.reactions
    : [];
  const slug = metadata.frontMatter.slug;

  // ...
  <BrowserOnly>
    {() => (
      <div className={clsx("col", { "col--9": truncatedPost })}>
        <BlogReactions reactions={reactions} slug={slug} />
      </div>
    )}
  </BrowserOnly>;
  // ...
  {
    !isBlogPostPage && <BlogEndBar />;
  }
  // ...
}
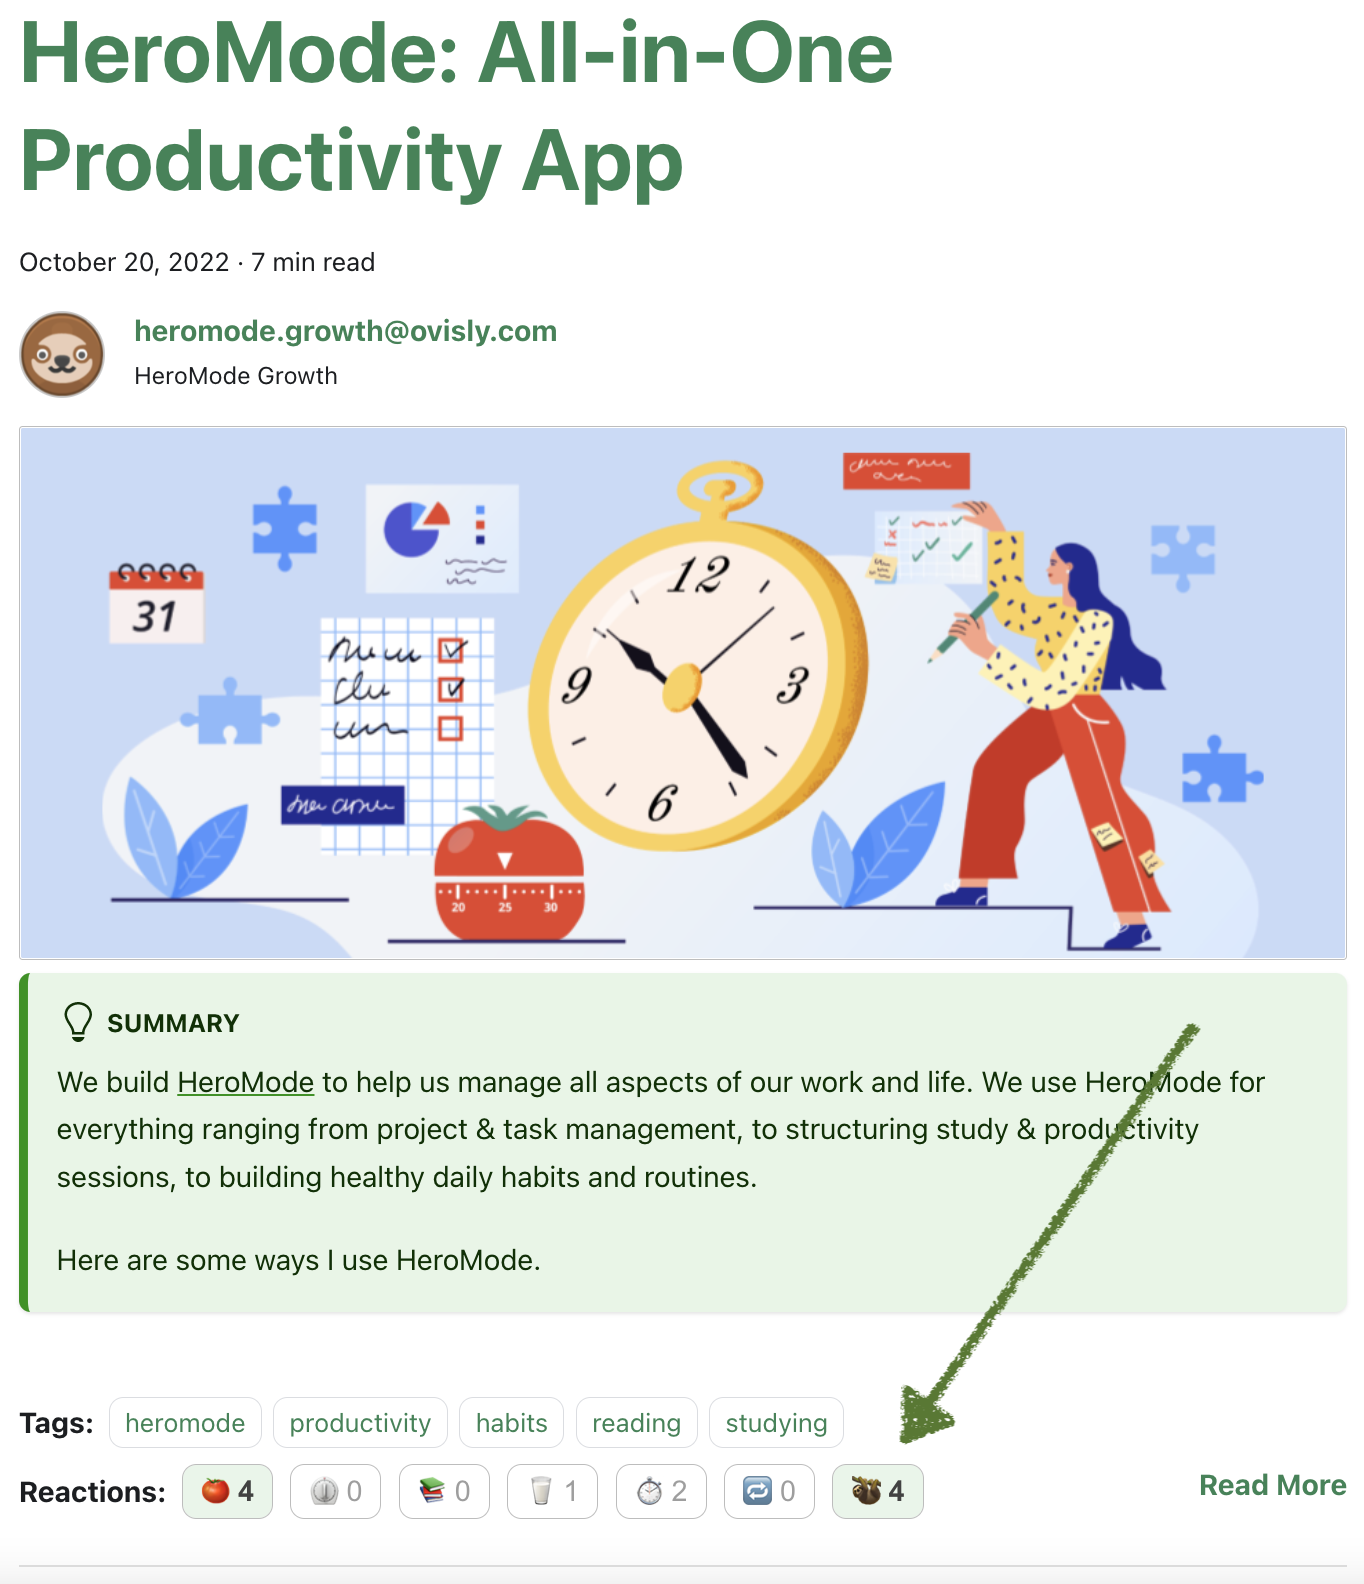
- For each blog post, in its Markdown file, the blog author can now add their favorite reactions. For example:
---
title: ...
description: ...
slug: ...

...

reactions:
  👋: hello!
  🦖: Docusaurus
  🔥: Firebase
---
- In your blog list page, you would see the reaction buttons show up!
Optional: Firebase Hosting
If you need a place to host your Docusaurus site, Firebase is extremely easy to use. You just need to get the Firebase CLI, then, in your terminal, deploying your Docusaurus site is only a few commands away.
Run
firebase init hosting, and usebuildfor public directory.Then
npm run buildto build your site, andfirebase deploy --only hostingto deploy it to Firebase.For example, we have set up the demo site at demo-docusaurus-blog-reactions.ovisly.com.
What's Next?
Now you have working blog reactions for your Docusaurus site! In addition, I added a small Easter egg. When you hover over a reaction, its title shows up! The blog author can pick the reactions, as well as their titles. This makes it fun for the blog author as they choose which reactions to include and what hidden messages to go along with them.
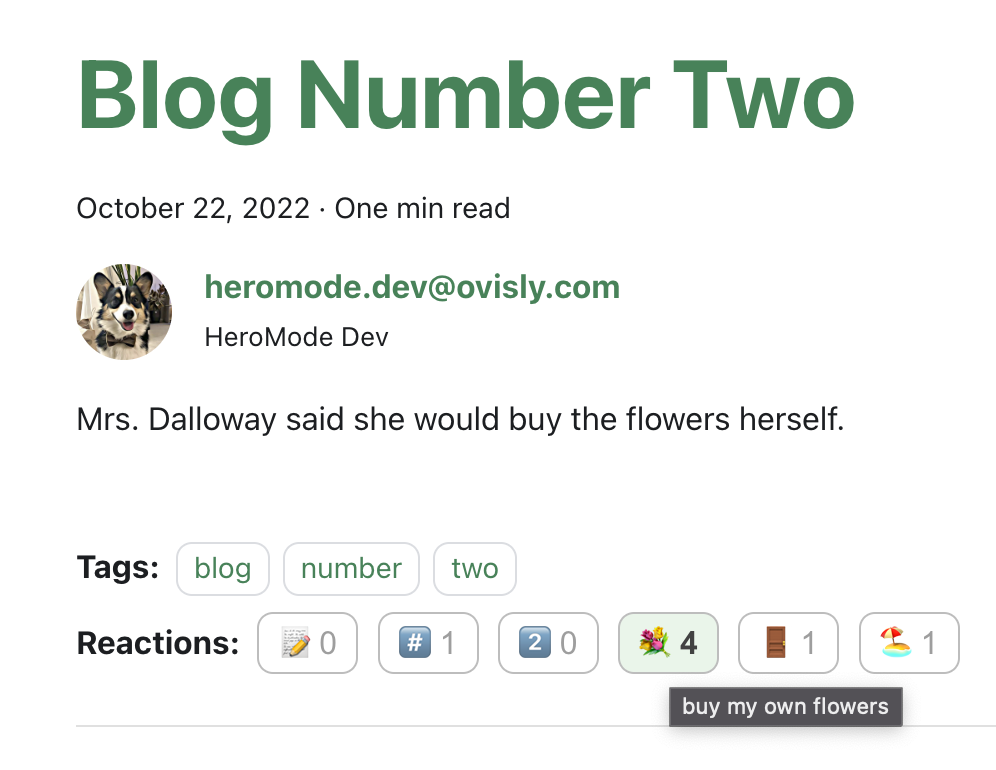
Above: Hovering over a reaction shows its secret message prepared by the blog author.
Now that we have seen how customizable Docusaurus can be, especially when integrated with a database like Firebase, we can imagine more blog features. For example, commenting. I also really want to make pressing a reaction button a more interactive experience -- instead of passively showing the reaction title when the user hovers over, which is very hidden, I want to make the title pop up when it's clicked, like the coins in Super Mario. I'm saving it for the next Hackathon!