
We describe how we customized our HeroMode blog with Docusaurus's swizzling functionality. Specifically, we added a blog header to give context to the blog. And we also added subscription buttons so visitors can stay in the loop about new posts automatically.
Last month, I described implementing blog reactions to a Docusaurus blog site. This adds a little fun, social element to our blogs at Ovisly and HeroMode.
This time I'll describe how we added a blog header and subscribe buttons to our HeroMode blog.
Subscribe Button: Keep Your Audience in the Loop
If you are writing a blog, there's a good chance you want to keep your audience up-to-date with new contents. This functionality can be added into Docusaurus. Here is a list of what we need:
- A subscription button component.
- We will add this button on the bottom of left side bar, under the "Recent posts" section. And we need to make sure it looks good on both desktop and mobile layouts.
- The subscription button should be linked to a mailing list management system.
- Send email notifications to your subscribers automatically when new posts are published. Conveniently, Docusaurus generates feeds for your blog by default. So you already have the key ingredient of an RSS feed.
For requirements 3 and 4, there are many blog subscription management platforms. We use ConvertKit just because it's the one used by a blog I follow. There are many alternative solutions you can use.
Custom Subscribe Button Component
For requirement 1, we will create a custom button component.
import * as React from "react";
import styled from "styled-components";

const StyledButton = styled.button`
  background: #0d47a1;
  font-size: 12px;
  color: white;
  margin: 0.6em 0.3em;
  padding: 0.6em 1.2em;
  border-radius: 6px;
  border: 1px solid #9e9e9e;
`;

const StyledInput = styled.input`
  margin: 0.6em 0.3em;
  padding: 0.3em 0.6em;
  border-radius: 6px;
  border: 1px solid #9e9e9e;
`;

// An example subscription button with an email address input. The component is
// currently not linked to a mailing list management system (see Requirement 3
// above). You can use any system of your choice and update the button submit
// action accordingly.
export default function ButtonSubscription() {
  return (
    <div
      style={{
        justifyContent: "center",
        display: "flex",
      }}
    >
      <StyledInput
        type="email"
        form="subscription"
        placeholder="Email address"
      />
      <StyledButton>{"Subscribe"}</StyledButton>
    </div>
  );
}
Add Subscription Button to Blog Sidebar
For Requirement 2, we will do some swizzling. There are two components for Bog Sidebar, one for desktop and one for mobile, so we will swizzle both.
npm run swizzle @docusaurus/theme-classic BlogSidebar/Desktop -- --ejectnpm run swizzle @docusaurus/theme-classic BlogSidebar/Mobile -- --eject
Then you can add the subscription button component into the side bar.
// ...
import ButtonSubscription from "@site/components/ButtonSubscription";

export default function BlogSidebarDesktop({ sidebar }) {
  return (
    <aside className="col col--3">
      {/* ... */}
      {/* ... */}
      {/* Begin customization */}
      <div style={{ height: "12px" }}></div>
      <ButtonSubscription />
      {/* End customization */}
    </aside>
  );
}
// ...
import ButtonSubscription from "@site/components/ButtonSubscription";

function BlogSidebarMobileSecondaryMenu({ sidebar }) {
  return (
    <>
      <ul className="menu__list">
        {/* ... */}
        {/* ... */}
      </ul>
      {/* Begin customization */}
      <ButtonSubscription />
      {/* End customization */}
    </>
  );
}
// ...
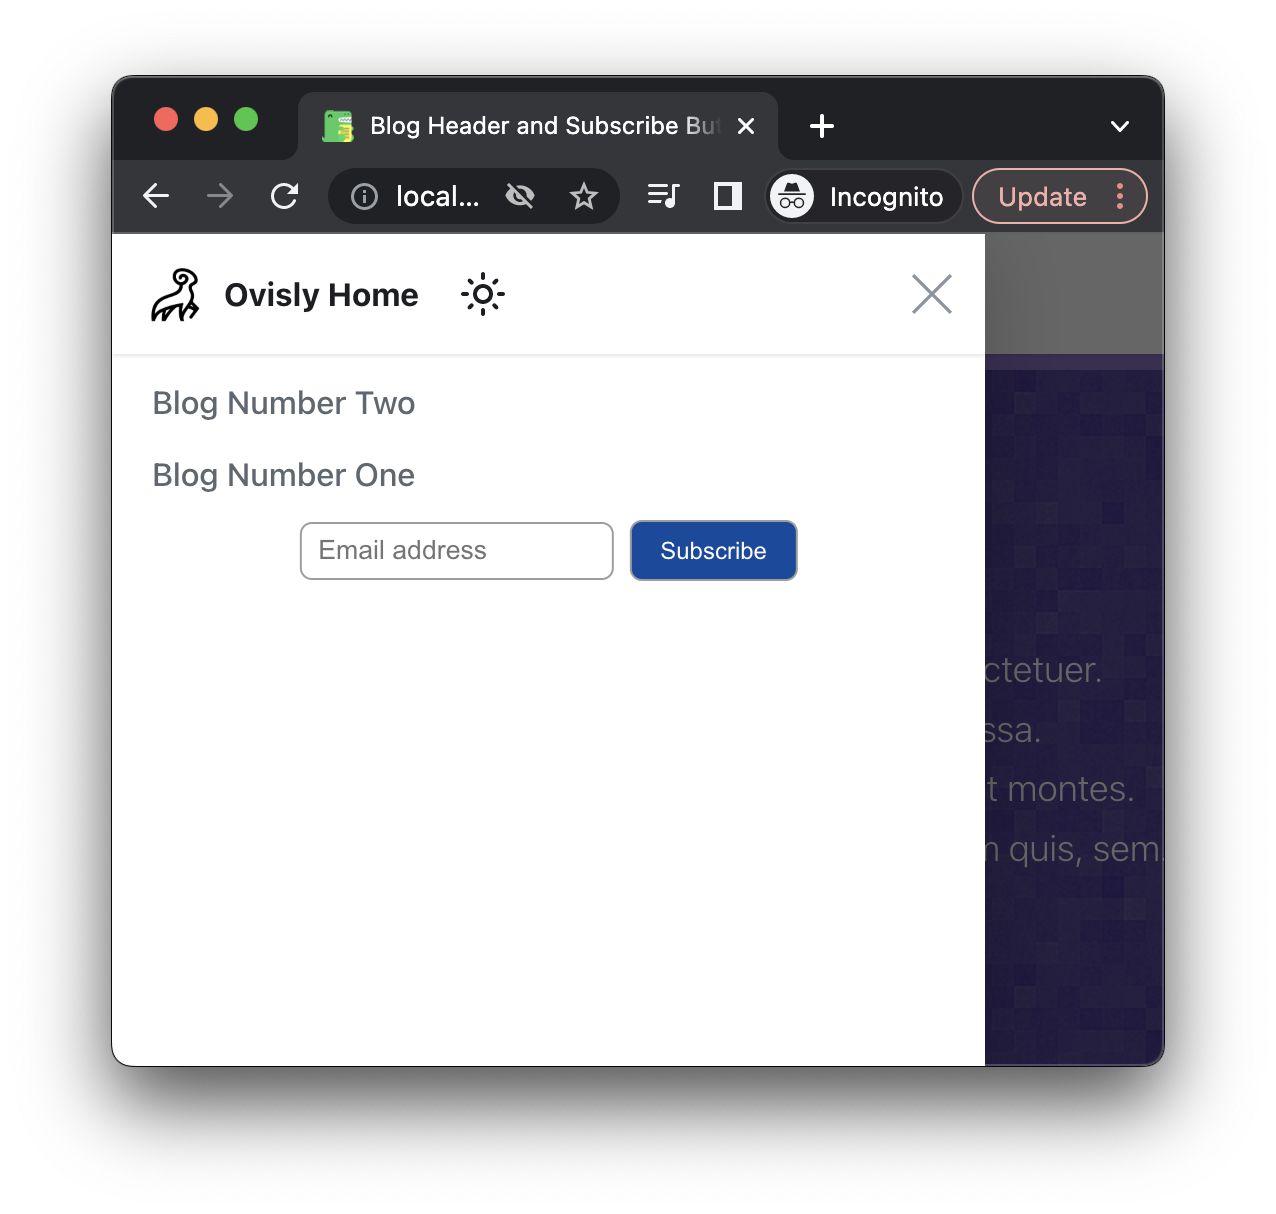
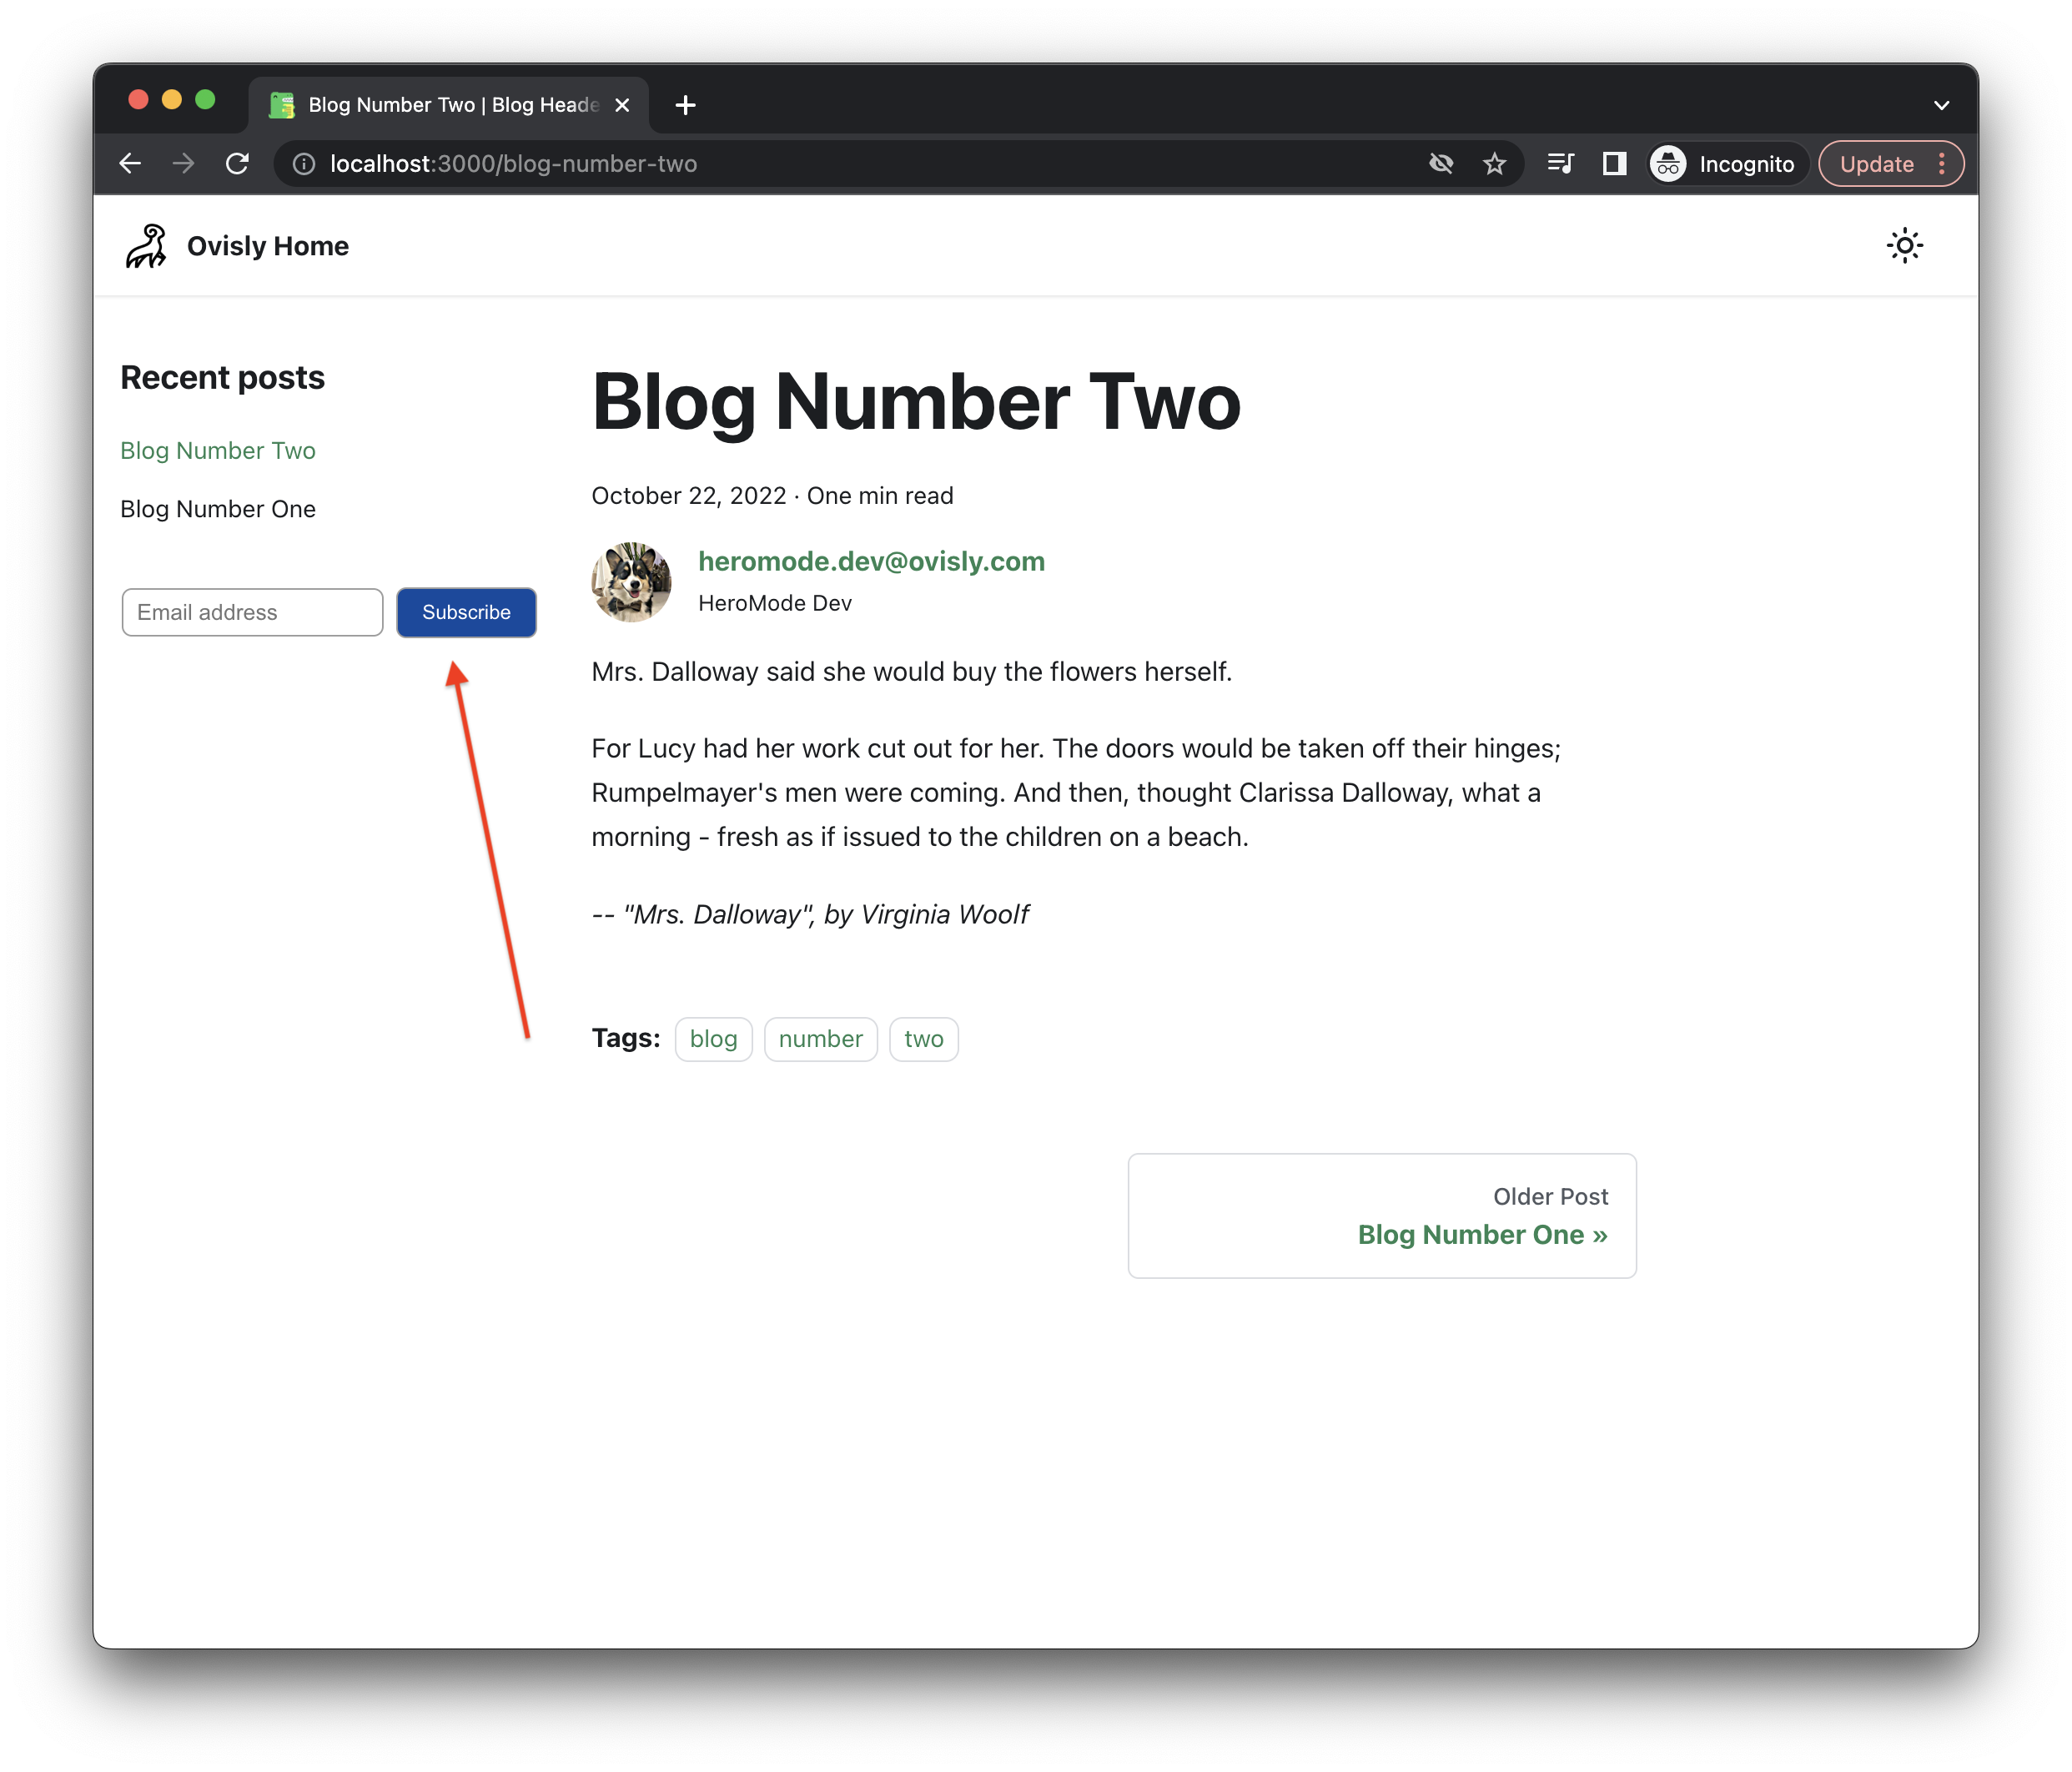
And now you have subscription buttons on your blog! You can adjust the styling as you like. For example, for HeroMode, we break the email address form and the subscription button into two lines instead of showing them on the same line.

Blog Header: Let Your Audience Know What Your Blog Is About
By default, the main page of your Docusaurus blog site contains a list of the most recent posts. But you may want to give your visitors some context about the topics covered in your blog before showcasing the individual articles.
Our requirements for a blog header are quite simple:
- Some banner-like component with a blog title and blog description
- Include the subscription button
- Show the blog header on the main blog site, but not within individual blog posts
Custom Blog Header Component
You can be creative with your blog header component. You can also work with a designer. Here is just a simple example. Note that the subscription button component is also included!
import * as React from "react";
import styled from "styled-components";

import pattern from "@site/static/img/pattern.png";
import ButtonSubscription from "@site/components/ButtonSubscription";

const StyledTextTitle = styled.text`
  text-align: center;
  font-style: normal;
  font-weight: 700;
  font-size: 48px;
  color: white;
`;
const textTitle = "Blog Title";

const StyledTextSubtitle = styled.text`
  text-align: center;
  font-style: normal;
  font-weight: 300;
  font-size: 18px;
  color: white;
  white-space: pre;
`;

const textSubtitle = `
Blog description, lorem ipsum dolor sit amet, consectetuer.
Aenean commodo ligula eget dolor. Aenean massa.
Sum sociis natoque penatibus et magnis dis parturient montes.
Donec quam felis, ultricies nec, pellentesque eu, pretium quis, sem.
`;

export default function BlogHeader() {
  return (
    <div
      style={{
        display: "flex",
        flexDirection: "column",
        width: "100%",
      }}
    >
      <div
        style={{ width: "100%", height: "8px", backgroundColor: "#9575cd" }}
      />
      <div
        style={{
          background: "#4527a0",
          width: "100%",
          height: "360px",
          justifyContent: "center",
          alignItems: "center",
          display: "flex",
          backgroundImage: `url(${pattern})`,
          backgroundRepeat: "repeat",
        }}
      >
        <div
          style={{
            width: "50%",
            minWidth: "720px",
            display: "flex",
            flexDirection: "column",
            alignItems: "center",
          }}
        >
          <StyledTextTitle>{textTitle}</StyledTextTitle>
          <StyledTextSubtitle>{textSubtitle}</StyledTextSubtitle>

          <div style={{ height: "36px" }} />
          <ButtonSubscription />
        </div>
      </div>

      <div
        style={{ width: "100%", height: "8px", backgroundColor: "#9575cd" }}
      />
    </div>
  );
}
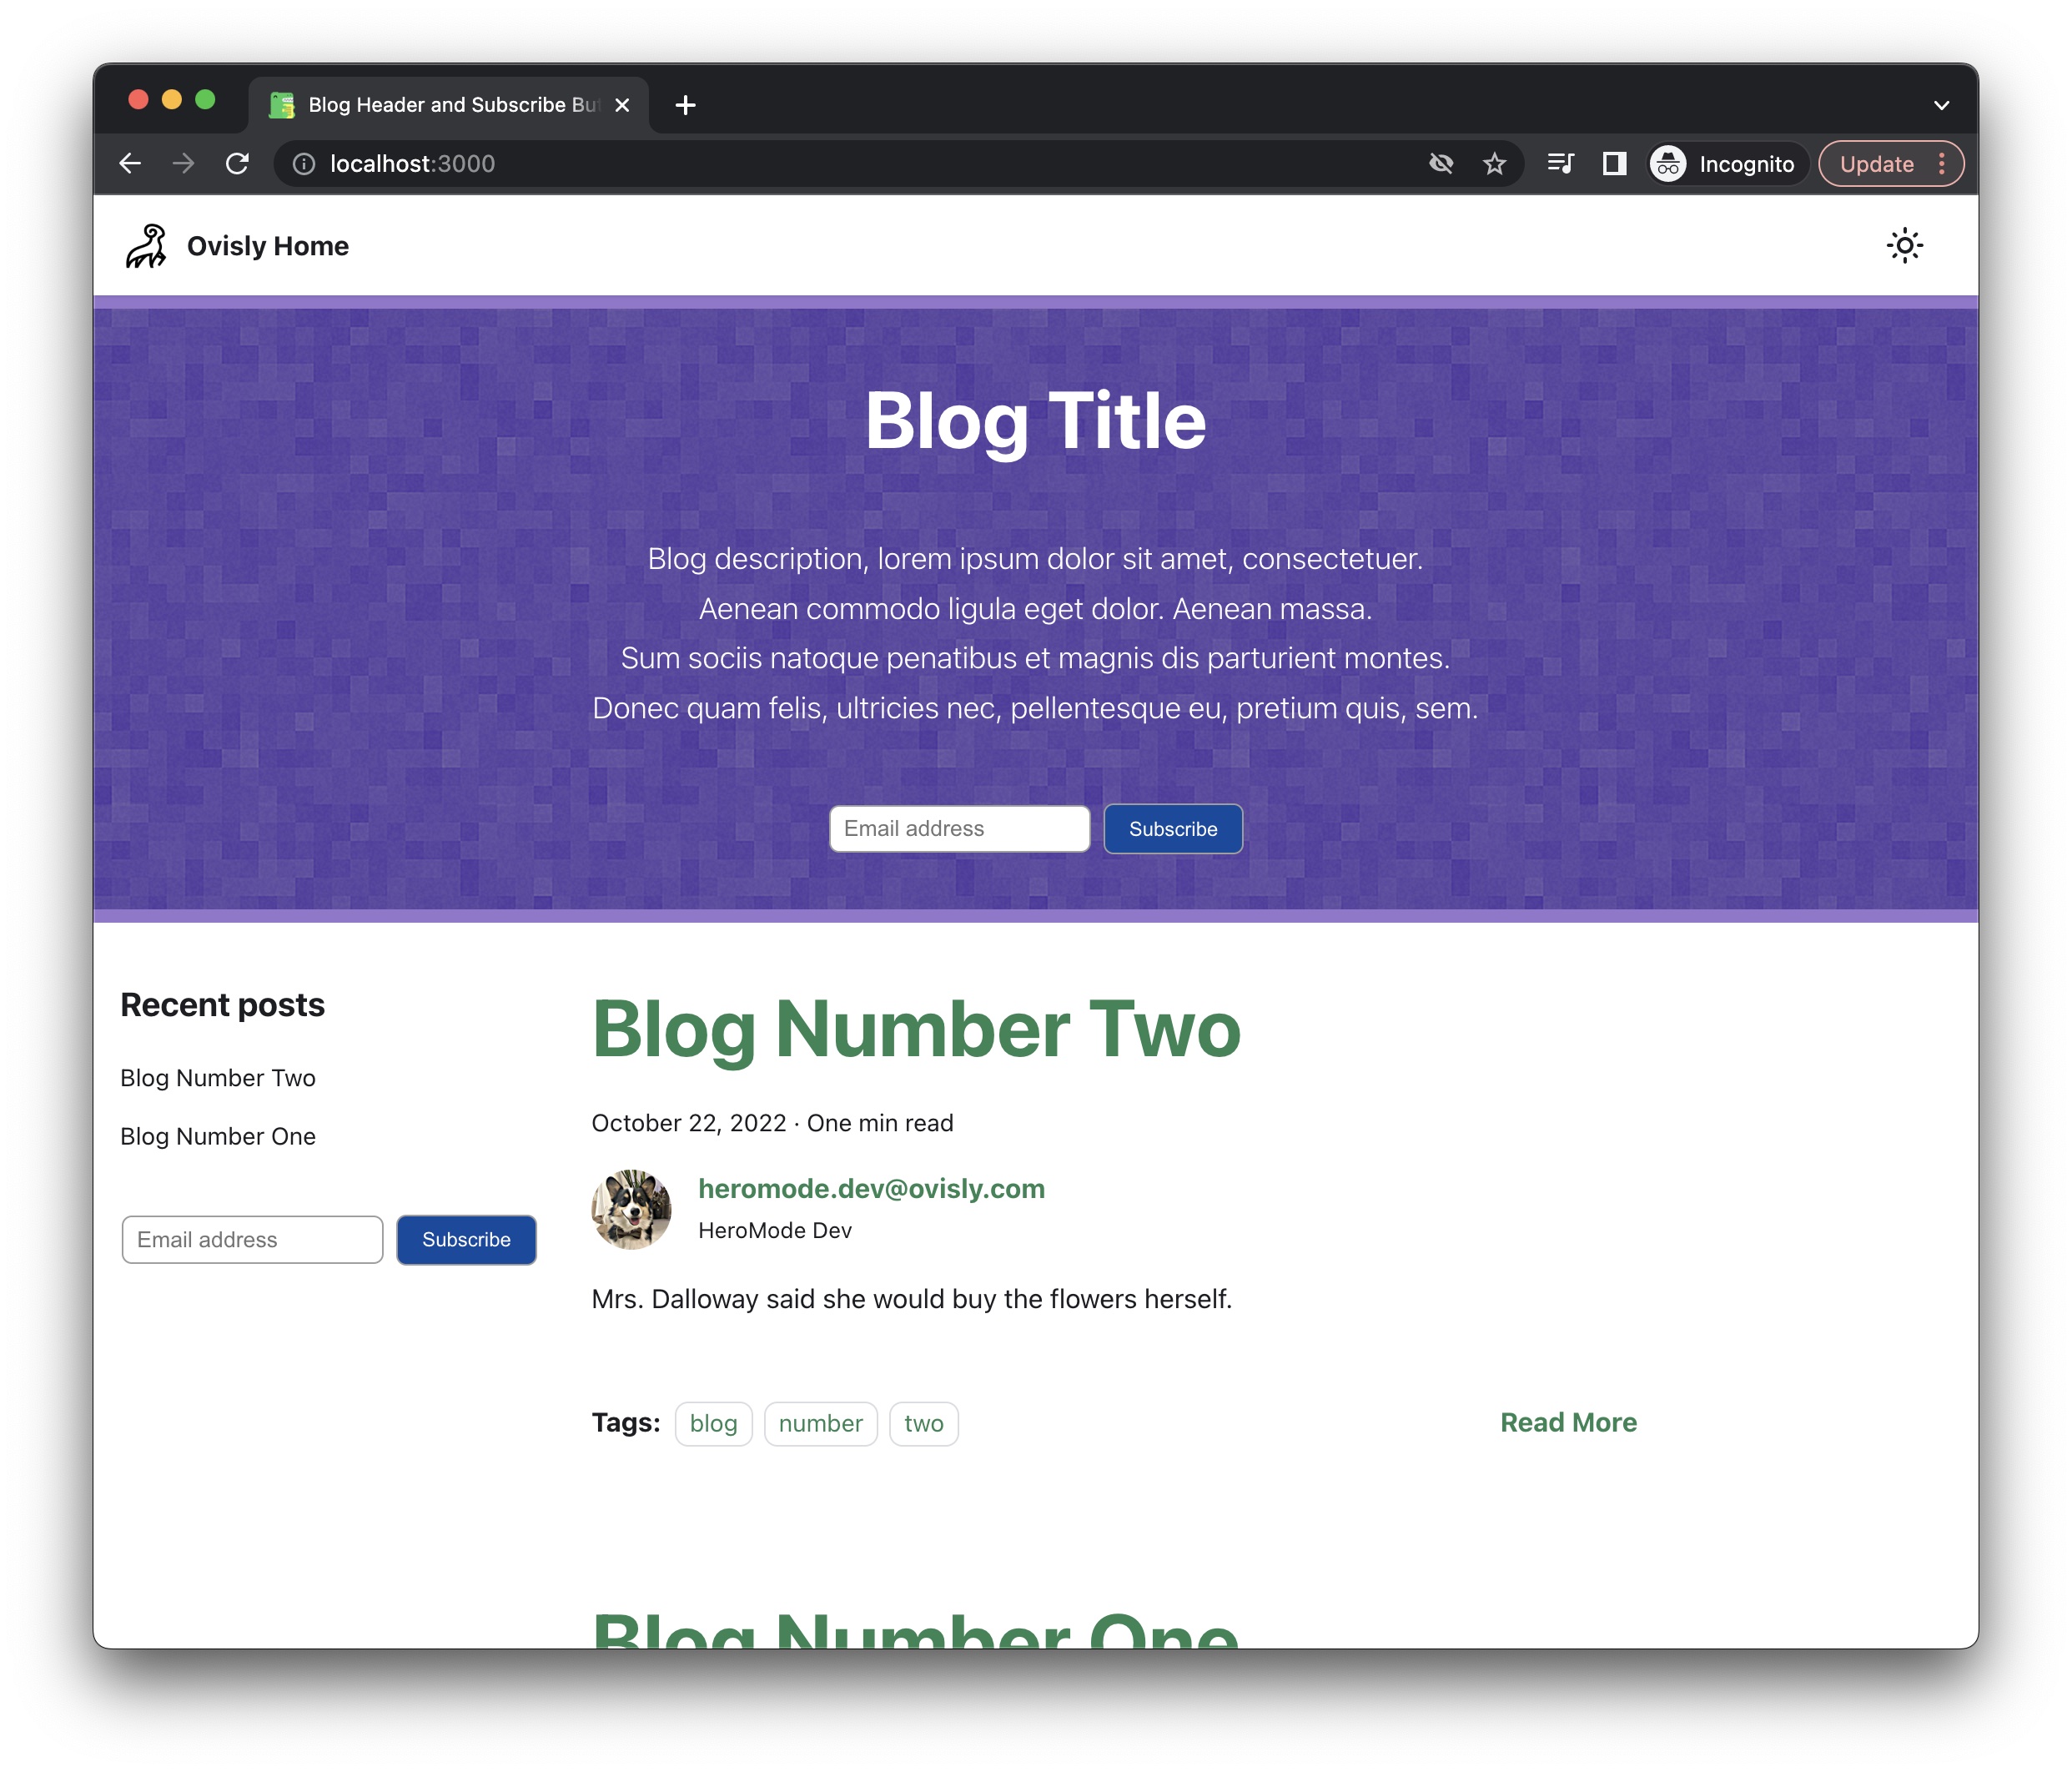
This simple header component has a blog title, description, and the subscription button. You can also add other information into this component. For example, you can call out your most popular blog posts in the header so a new visitor knows where to get started.
Add Blog Header to the Main Blog Page
It's swizzling time again! We will
modify the BlogLayout component to include the blog header. In addition, we
only want the header to show up in the blog main page (controlled by the
BlogListPage component), not in the individual articles, so we will also
modify that component.
npm run swizzle @docusaurus/theme-classic BlogLayout -- --ejectnpm run swizzle @docusaurus/theme-classic BlogListPage -- --eject
For BlogListPage, we want it to call BlogLayout component with an additional
prop so we can differentiate it from the individual blog page (BlogPostPage).
// ...
function BlogListPageContent(props) {
  const { metadata, items, sidebar } = props;
  return (
    {/* Begin customization */}
    <BlogLayout sidebar={sidebar} isBlogListPage={true}>
    {/* End customization */}
      <BlogPostItems items={items} />
      <BlogListPaginator metadata={metadata} />
    </BlogLayout>
  );
}
// ...
This new prop, isBlogListPage, will let BlogLayout know if it should display
the header component.
// ...
import BlogHeader from "@site/components/BlogHeader";

export default function BlogLayout(props) {
  // Begin customization
  const { sidebar, toc, children, isBlogListPage, ...layoutProps } = props;
  // End customization
  const hasSidebar = sidebar && sidebar.items.length > 0;

  return (
    <Layout {...layoutProps}>
      {/* Begin customization */}
      {isBlogListPage === true && <BlogHeader />}
      {/* End customization */}

      {/* ... */}
      {/* ... */}
    </Layout>
  );
}
And then we are done! The blog header will look like below. When you click into one of the blog articles, the header is no longer rendered as we had intended.
To Swizzle or Not to Swizzle?
Swizzling is extremely powerful in terms
of customizing all aspects of Docusaurus. But is it okay to do? The concern is
valid especially all four components we're swizzling today
(BlogSidebar/Desktop, BlogSidebar/Mobile, BlogLayout, BlogListPage) are
designated as Unsafe, and we get big red warnings before ejecting the
component.
When I first did Docusaurus swizzling to add reactions to blog posts, I had a lot of apprehensions. I'm the type of person easily deterred by warnings. But later on, maybe I got the taste of the swizzling power, or maybe I learned more about the underlying mechanism through Docusaurus's comprehensive documentation, now I feel comfortable moving in this direction.
For me, swizzling is quite similar to patch package, from the perspectives of both the utility of these approaches (allowing one to make boundless modifications to the package), as well as the subsequent responsibility that befalls the developer (heed when source package is updated, as the customizations are version specific and would need to be re-applied).
Well, I actually do need to update our Docusaurus version from 2.1.0 to 2.2.0. So I'll come back and let you know if that really is as breezy as I'm making it sound.
Are All the Customizations Worth It?
Follow up question: since our choice of using Docusaurus as our blogging platform, we have had to customize several functionalities, some are out-of-the-box for alternative platforms. For example, new post notification and additional social features are readily available with Medium. So is it worth all the effort to customize Docusaurus?
I think the answer will really depend on your scenario and preferences. For us, these customizations have not been too bad -- swizzling really makes everything possible.
The most salient factor for our blogging platform choice was actually our documentation platform choice. We love documenting. Both for our future selves, for each other at Ovisly, and for our users.
And when it comes to documenting, Docusaurus has been a joy to use. We were able to set up HeroGuide over a weekend. And we can version control it the same way as application code.
Blogging, in a way, is also documentation. It makes our lives tremendously easier to be able to write blog posts in exactly the same code editor, and with exactly the same version control and code review process.
It's not to say that we won't adopt new tools in the future. Never say never when it comes to technologies. But so far, for us, using Docusaurus has been quite efficient and joyful.